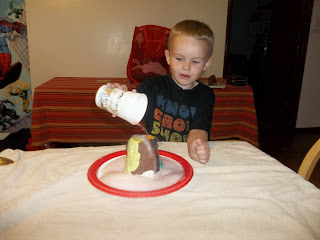
To prove that I really am a scientist, C and I had to make a volcano together. C was disappointed when I told him we were making it at home; he wanted to do it at my work (aka the labs). Next science project will have to be in a real lab then. L Child and Daddy went for a drive while C and I got started.
 |
| Step 1: Gather all your materials. Including one excited little boy. |
 |
| Step 2: Have a brief overview about volcanoes complete with an Earth Science textbook and a piece of scoria. |
 |
| Step 3: After cutting a vent (a hole) in a plastic cup, cover the cup with clay. (A big shout out to my friend Taylor who suggested the easy plastic cup covered with clay idea!) |
 |
| Step 4: Add red food coloring to vinegar. |
 |
| Step 5: Put baking soda on the plate in a pile. |
 |
| Step 6: Place the colorful volcano on top of the baking soda. Anticipate the explosion. |
 |
| Step 7: Pour vinegar through the vent onto the baking soda. |
 |
| Step 8: Enjoy the show! |
 |
| Step 9: Make a different type of "lava." Add corn starch to the cup. |
 |
| Step 10: Add a little water to the cornstarch as well as red food coloring. Stir it up well (an adult will probably will be needed to stir). |
 |
| Step 11: Pour this viscous lava on and around the volcano. This homemade "lava" is neat because it seems to go back and forth between a solid and a liquid. |
While we waited for Daddy and L Child to return home, we watched some volcanic eruptions videos on the Internet as well as went to a cool website to make different types of volcanoes and have them explode on screen.
L Child arrived back home and got to make both types of lava as well. He was a bit wary at first but enjoyed the show.


4 comments:
I hope he believes you're a scientist now!
me too, Amber. me too!
Well.. I sure hope you proved to him!! Looks like loads of fun!!! I didn't do volcanoes with my kids this year but even I was excited last year when I tried it at home!! LOL
haha - we could make an activity for your kids at school - something age appropriate. do you cover volcanoes?
Post a Comment